

How to care for your Harmonica, the ultimate Eagle Music harmonica maintenance guide
Tips for use and maintenance of your instrument.
Despite their simple look, easy portability and intuitive playing style, there is a lot more than meets the eye when it comes to harmonicas. Whether diatonic or chromatic, it is easy to forget how sensitive and carefully built they can be on the inside. From out-of-key holes to jammed sliders on chromatics, the fun of playing can sometimes turn into puzzled frustration. Let us not despair though.
Here at Eagle Music, we have experienced many of these set-backs as harp players and have been exposed to similar reports from our customers. Most of the time, these issues have little to do with the engineering or manufacturing of the harmonicas but more to do with simple, omitted maintenance steps that can be carried out to lengthen the life and optimize the playability of your instrument.
We thought we would compile a list of some of them so you can make the best out of your harmonica, including before, during and after-playing tips as well as easy-to-apply cleaning and maintenance guidance.
Without further ado, let’s delve into our ultimate harmonica care and maintenance guide.
1 – Different parts reminder
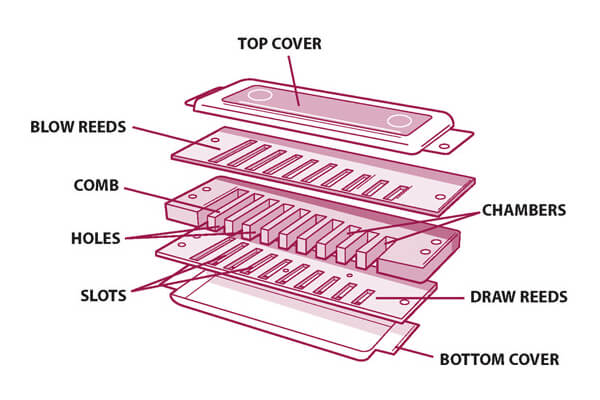
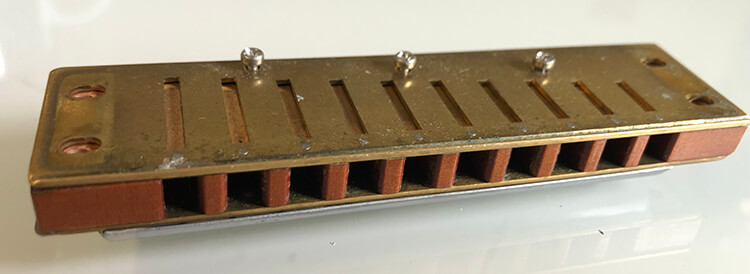
Whether your harp of choice comes from Seydel, Hohner, Suzuki, or any other brand, they will most likely be built around a similar assemblage of parts. We have covered the anatomy of the harmonica in a separate article but see below for a simple diagram as a reminder and a point of reference moving forward.
2 – Good use
Many things can compromise the sound and playability of your instrument. Three of the main ones being oxidation, particulates (like dust or saliva residue) and what is known as “overplaying”.
Another variable can include the temperature of where you are playing and how it can affect the reeds. Anything below 10°C (or 50°F) may lock the reeds in place. If this happens, it is recommended to gently blow in for a few minutes to warm up the reeds.
On cold winter nights and depending where you live, make sure your harmonicas are nice and cosy at home and avoid leaving them overnight in a car or a garage after gigging for example.
Playing technique
We all start playing an instrument out of passion and the harmonica is no exception! But oftentimes with wind and reed instruments, passion might translate into 'a lot of blown saliva'. The drier your harp is, the less prone to oxidation the reeds will be and the longer it will last as a general rule.
Excess saliva can’t really be helped but can however be minimized to some extent by good habits, before, during and after playing.

Playing technique plays a big role in the amount of air being blown through the reeds of your harp. A good way of thinking about the intensity of your playing is to think of it as a singer. A good posture and playing deeply “from your diaphragm” at a normal breathing intensity will go a long way to improve both your tone and your reeds’ health in the long run. This is due to less saliva being blown into the reeds. This also prevents what is known as “overblowing”, a too-high playing pressure that can lead to reed failure or detuning: a common issue that has been encountered by many self-taught enthusiasts (including the author of this article!)
Another good way of preventing overblowing is to apply the right “embouchure” with your mouth depending on the notes you play. This is down to playing techniques and would require a whole lesson but more on this can be found on the internet, in books or through your harmonica mentor.
Another simple but effective tip is to swallow your saliva as often as possible to limit any excess from building up in your mouth and ending up in your reeds. For your own comfort and hygiene, you might want to make sure your harp is as clean as possible when swallowing your saliva after drawing breaths from it. We will cover the cleaning and maintenance advice further in this article.
Clean mouth
Whether playing in a pub session, on a big stage or at home, there’s nothing wrong with enjoying a beverage whilst playing your harmonica! However, you might want to have a glass of water at hand to rinse your mouth so you can avoid blowing micro drops of beer, sugary drinks, tea, gasoline or whatever your choice of drink is into your harp.
It goes without saying that the same applies to food residue. As a general rule, the cleaner your mouth is before playing, the cleaner your instrument will be too. Your reeds and your partner will thank you later.
Good habits after playing
To limit the saliva residue within the comb and reeds, you can gently tap your harmonica face down into the palm of your hand for a few seconds when you’re done playing. This will help get rid of the excess saliva and particulates left in there.
Another good habit to have if you keep your harps in a case, is to keep the case open for as long as possible before shutting it to let the accumulated moisture dry out.
For chromatic harmonicas, you can drip a little bit of water through the slide assembly or dip the mouthpiece into a shallow container (so as not to dampen the comb) before and after playing to get rid of saliva residues and to prevent the slide from sticking to the rest of the parts.
3 – Cleaning & maintenance
Despite all efforts to keep your instrument clean and operational, there will come a time when your instrument starts showing signs that it needs a good service. These signs might include compromised playing or tuning, visible residue in the comb and sometimes a questionable smell. On chromatic harmonicas, a common issue can be a jammed or sluggish slider. Again, most of the time these issues can be easily resolved and simple maintenance steps can go a long way if applied well. Let’s have a look at them in further detail.
General cleaning of the outer parts
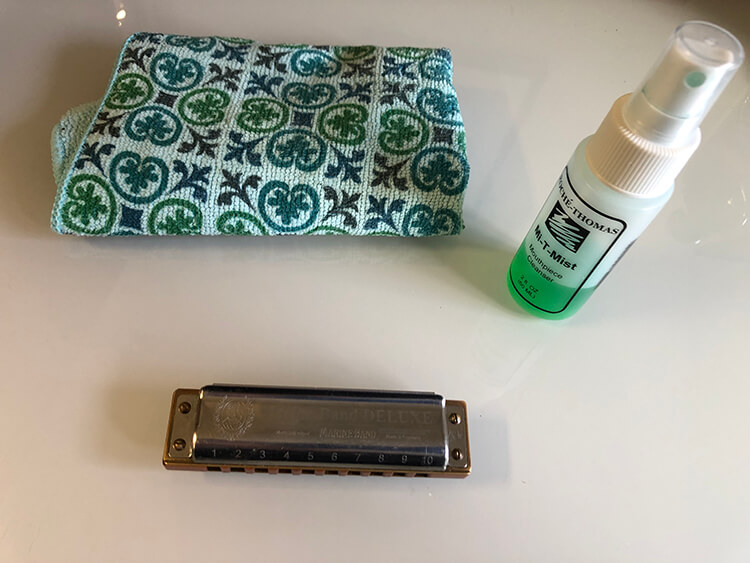
For a regular clean and general hygiene, we highly recommend using the Mi-T-Mist mouthpiece cleaner from Roché-Thomas along with a soft cloth to spray and wipe your mouthpiece. This will leave it both shiny, disinfected and smelling nice and fresh for the next time you pick it up.
You might want to give your harmonica a deeper clean. For that, you will have to dismantle your harmonica carefully. Both Hohner and Seydel have their own harmonica maintenance kits which include great tools to keep your harmonicas in great shape and might save you spending on new instruments, parts or repairs in the long run. You can dismantle your harmonica without a kit, you will just need a screwdriver adapted to the brand of harp that you play.
Find yourself a well-lit place, give yourself plenty of room, a flat top like a kitchen table and a comfortable seat.
Cleaning the mouthpiece and slide assembly for chromatic harmonicas (skip this part for diatonics)
As mentioned earlier, a common issue with chromatic harmonicas is having a jammed slider, usually due to an excess of dried saliva gluing the slide assembly parts together. It is recommended to clean the latter fairly regularly to prevent the slider from getting stuck. Please note that when you do, it is recommended to have your cover plates screwed on before dismantling the mouthpiece to help prevent the comb from warping due to unequal pressure.

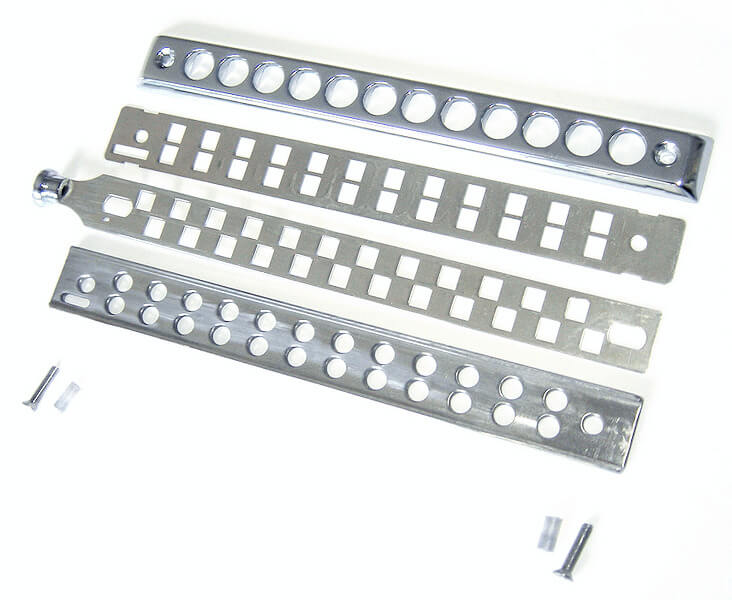
You will usually find two extra screws on both sides of the mouthpiece. Unscrew them gently and you will find little rubber bumpers on the screws. Make sure you keep them on the screws and somewhere safe as they are easily lost.
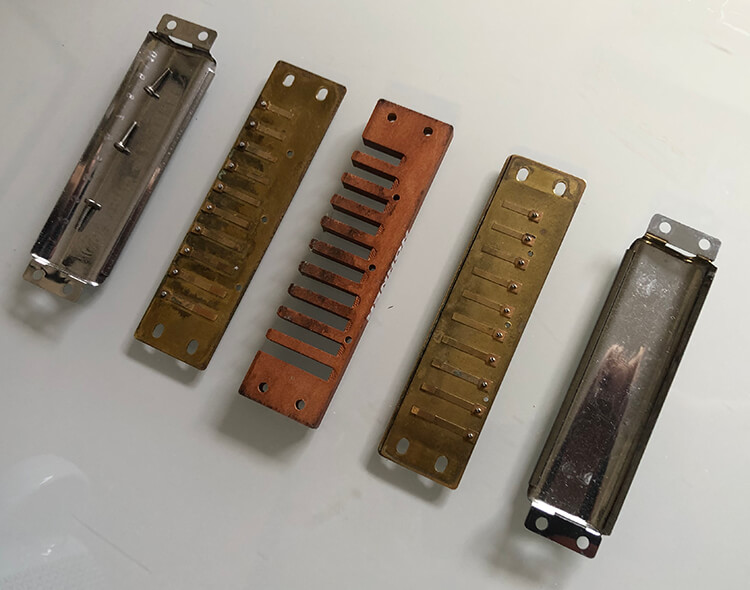
You will now end up with three or four parts: the loose mouthpiece, the slider with button and a backing plate that sits between the slide and the front of the comb. Some models have a flange between the mouthpiece and the slide (most Hohners) and some others have those integrated to the mouthpiece itself. Make sure you make a note of the order in which each part relates to another in terms of order and orientation. You can take a picture or number them with a tiny square of masking tape. You will thank yourself later when you reassemble everything.
All parts can now be wiped and cleaned like the cover plates (see ‘General cleaning of the outer parts’)
Once cleaned, you can apply a very thin film of slider oil onto the slider (the one with the button on one end). Be really mindful that too much of that oil can drip into the reeds and valves of your chromatic harmonica, which can lead to them sticking and leaving the whole instrument unplayable. A tiny bit will go a long way.
It's now time to reassemble your slide package. As precise as this article aims to be, every model is different. As a general rule, make sure everything is well aligned on top of your comb so your harmonica is airtight once reassembled. For the ever-popular Hohner Chromonica or Seydel Chromatic Deluxe (as shown in pictures) for example, you can put the flange and the backing plate together to form a “chamber” where the slider will be able to slide. You can then do so and place your slider system between the mouthpiece and the comb.
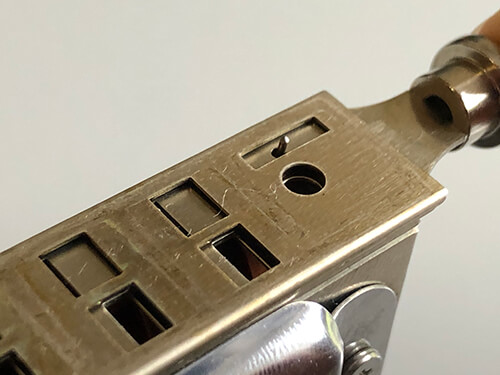
When placing these parts back on top of the comb, make sure that the outer part of the spring is placed within the hole of the slide (see picture below) so your slide bounces back into place when pressed.
When screwing back the mouthpiece, be sure to stop at the first signs of strong resistance and alternate between the two sides so you’re not applying unequal pressure on one side or the other. Too much pressure will block your slide and could warp your mouthpiece if left for too long.
This procedure can be repeated regularly depending on how frequently you play your instrument and whenever your slider gets jammed. It will get easier the more you do it.
Cleaning the inside of the covers, the comb, reeds and reed plates
Opening up a harmonica can be a frightening endeavour but there will come a time when you need to undergo this surgery to give your instrument a good clean or to access the reeds for one reason or another. This doesn’t have to be a burden and can become a very satisfying job and routine that gets easier the more you do it, providing you’re working with the right tools and guidance. Good news, we can help with both.
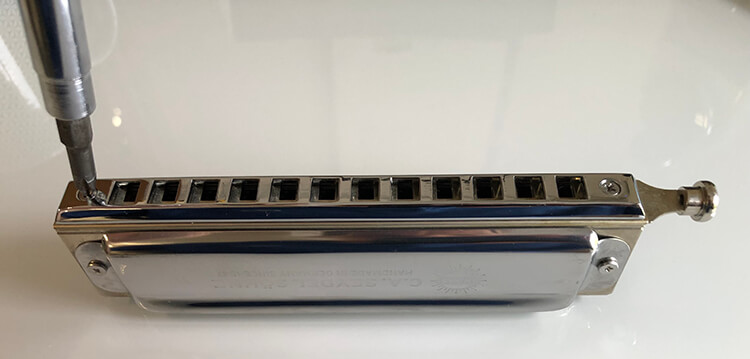
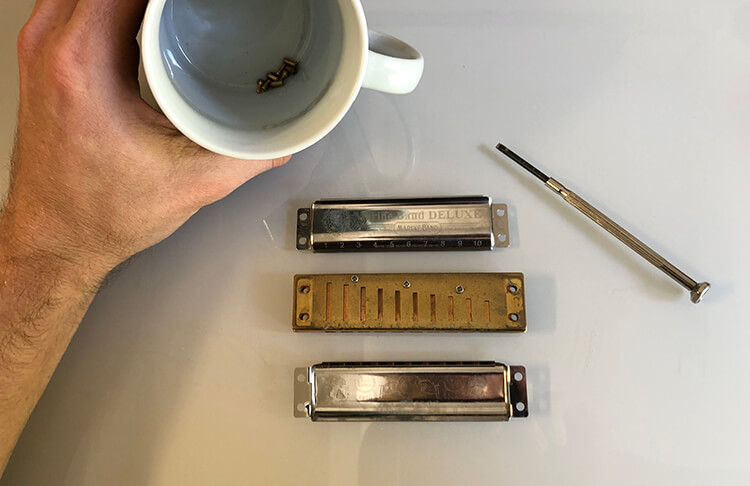
First, unscrew the cover plates on both sides of the instrument. Some models have four (ie: Hohner Marine Band Deluxe or Crossovers) and some have only two (ie: most Seydel diatonics). Once unscrewed, you might find bits of dried saliva and dried skin in your covers that you can easily wipe off with a soft cloth and Mi-T-Mist. Alternatively, you can use warm water and a soft toothbrush. Be careful that when dismantling a harmonica, screws are very small and can be lost easily. Have a little container at hand to put everything in and ideally make sure you make a note of where each screw was in the first place to screw them back where they were before.
Now that you have opened your harmonica, you will then have to separate the reed plates from the comb. This is a delicate part. Remember that the reeds are the most sensitive and vulnerable parts of your instrument and are responsible for its tone and tuning. Any harsh handling or adjustments can potentially alter those. For that reason, keep your harmonica vertical rather than leaning on either side or resting on the cover plates (and therefore avoiding pressure on either of the reed plates). It is also suggested by certain manufacturers not to bother with cleaning the reeds if the harmonica plays well (also known as an if-it-ain’t-broke-don’t-fix-it policy).
Note that you can actually start the cleaning process by rinsing the comb and reed plates screwed together under warm tap water to remove excess saliva if - and only if - your harmonica doesn’t have valves (also known as wind savers). Valves are usually fitted on chromatic harmonicas but can be found on some diatonic ones too (ie: Suzuki MR350 Valved Promaster). This step is also preferable for metal and sealed combs to avoid comb swelling on unsealed wooden ones.
You can then start the process of unscrewing the reed plates by first loosening every screw gently and then completely unscrewing them in two or three go’s, so that no unequal pressure is applied on the reed plate during the process. You will end up with the loose comb, both reed plates and loose tiny screws. Keep the screws safe in your little container. Ideally, you will also put the screws back in their original holes so keep them lined up in a certain order within your container if you can.
You can now start cleaning your comb and reed plates.
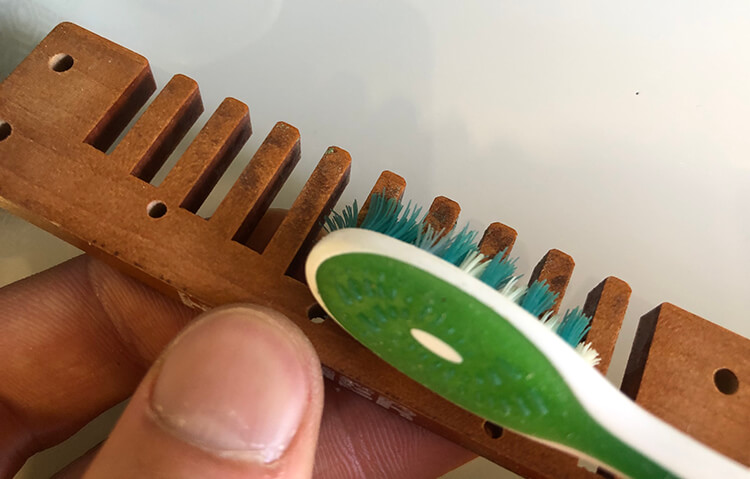
For this purpose, you can use the reed-lifting tool from your harmonica maintenance kit. For the comb, carefully scrape any residue from it with the reed-lifting tool without damaging the wood or metal then graze it gently with a toothbrush and in between the teeth of the comb.
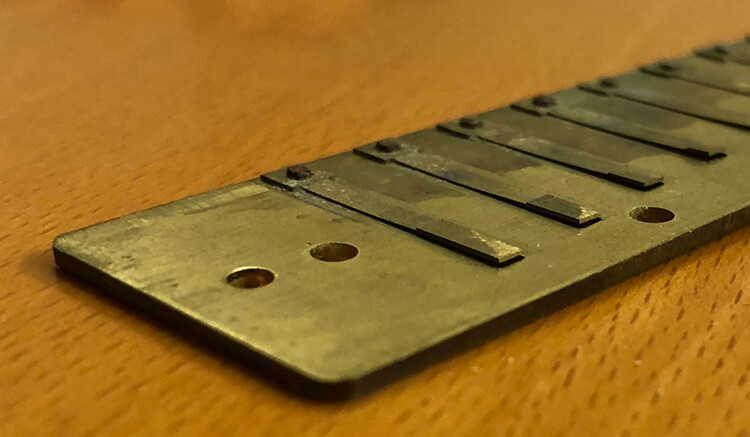
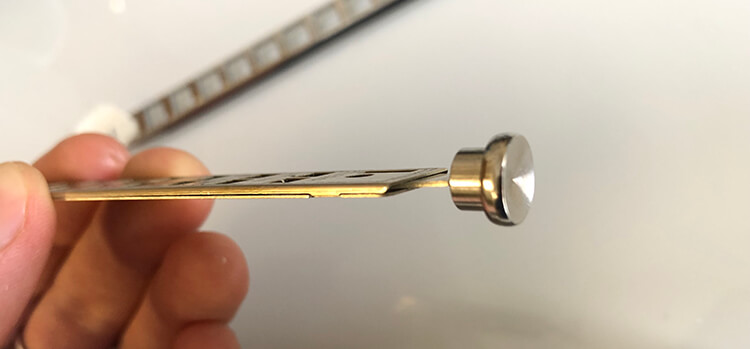
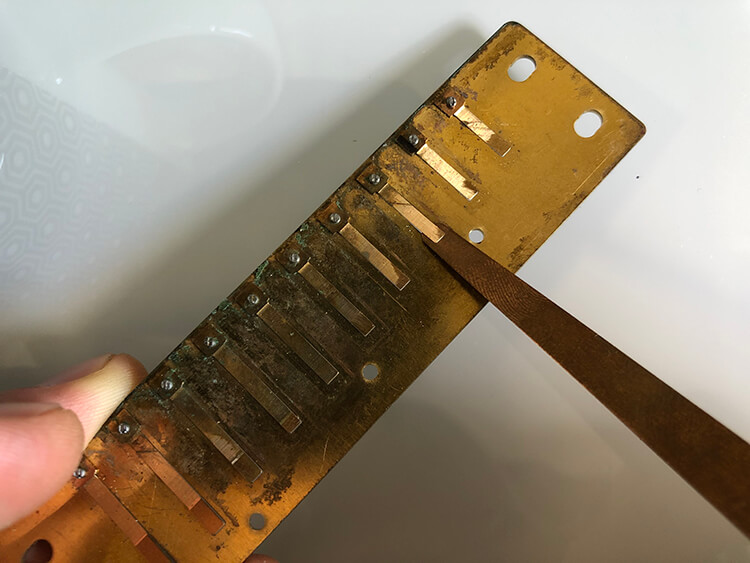
When it comes to the reed plates, it’s worth repeating that caution is needed when handling. Hold them by their edges (see picture) and with the reed-lifting tool, very gently lift the reeds one by one and let them bounce back into place to remove any residue that might be stuck on their edges and prevent them from working properly.
You can wipe the edges of the reed plate with a cloth but avoid working with a brush or a cloth when it comes to the actual reeds and their slots.
If your harp has valves (also known as wind-savers), you can clean them or unglue them by removing the excess of saliva residue on them. Keep everything dry in the first place and lift the valve with a needle or very thin piece of plastic. You can then softly insert a piece of dampen paper (with a nice grain like coffee filter for example) and insert it between the valve and its hole. Gently rub the valve on it to remove any residue from it.
You might decide to dip your reed plates into lukewarm water with some white vinegar for 20 minutes to facilitate the cleaning process before scraping anything. As a reminder, this applies to valve-less harps only. If you do, rinse with warm water (not hot) and make sure you dab (and do not rub) the reed plates dry with consequent caution.
Once the components of your harmonica are clean and dry, the time has come to reassemble it.
Screw your reed plates back onto the comb, tightening the screws gradually in two or three stages and making sure pressure is equally applied over the reed plate. Stop turning as soon as you encounter firm resistance. This part is crucial in the reassembly of your harp as overtightening (or under tightening for that matter) can lead to warping the reed plate and make your harmonica air-permeable and/or out of tune due to reeds being out of alignment.
You may now screw your cover plates back in place and test every hole of your harmonica to make sure it is playing as you want it to be. You may also try the slider of your chromatic to make sure it is working as it should.
Now would be a good time to refer back to the first part of this article about “good use” and enjoy playing a clean, well-looked-after and good sounding harmonica.
Conclusion
After going through all these steps together, we realise that the harmonica is a delicate and sometimes temperamental instrument that can be altered by several, yet preventable variables. As a general rule, prevention and maintenance will always be preferable to the cure. However, we hope that we might have been able to help demystify the daunting task of opening and cherishing your harp both on the outside and on the inside.
You can now go and grace the world with your “harping”, confident in your ability to play, maintain and repair your beloved instrument.
Happy playing from all of us at Eagle Music.
Article contributors: Lucas Bernard, Rachel Price, Matt Chaffer